A Dev Environment On Your Phone
I’m editing some Go code in nvim, with syntax highlighting, autocomplete, and ability to build and run, on my iPhone X.
The iPhone is running an iOS terminal app using the Mosh protocol to connect to my laptop at home over the cellular network. I have access to all the same things that I would use if I were working normally. I can code, test, commit and push code as usual, and use all of my pre-configured toolchains like kubectl and gcloud. I have an Apple Magic Keyboard paired, which is great for speed and easy use of modifier keys, but not totally necessary for some light tasks.
In this post, I’ll explain the motivations, and how to get your own setup running using an iOS device and a Mac.
Why bother?
- I can travel without a laptop and have peace of mind in being able to bounce a proces, scale a service, run a failover, or just troubleshoot an issue at any moment.
- I have access to all the same tools and configurations I would normally use on the command line, no matter what device I have with me, be it a latop, iPad, or iPhone.
- I can run a long process such as an ETL, and check up progress remotely, make adjustments, restart it etc.
- It’s SO cool
Getting up and running on iOS and OSX
The Mosh Client
First, you will need to download a terminal application. There are really only two worthwhile choices here:
- Blink Shell - Open source, but expensive in the app store ($20)
- Termius - Good and free, with paid subscription features
I recommend starting with Termius for free and upgrading to Blink shell if you later want to. Both of these apps support Mosh, which is an SSH replacement designed to work better over spotty connections. One of the most notable features of Mosh is called “ intelligent “local echo” which minimizes the perceived latency while typing. With typical SSH, every keystroke has to round-trip to the remote machine and back before it appears on your screen. This is infuriating and will slow you down. Mosh feels smooth even on a high-latency connection, and supports roaming in and out of service without losing your connection.
Mosh Server
You’ll need to install mosh on the server as well. This is dead simple to install on a variety of platforms
For a Mac with homebrew, simply run brew install mosh
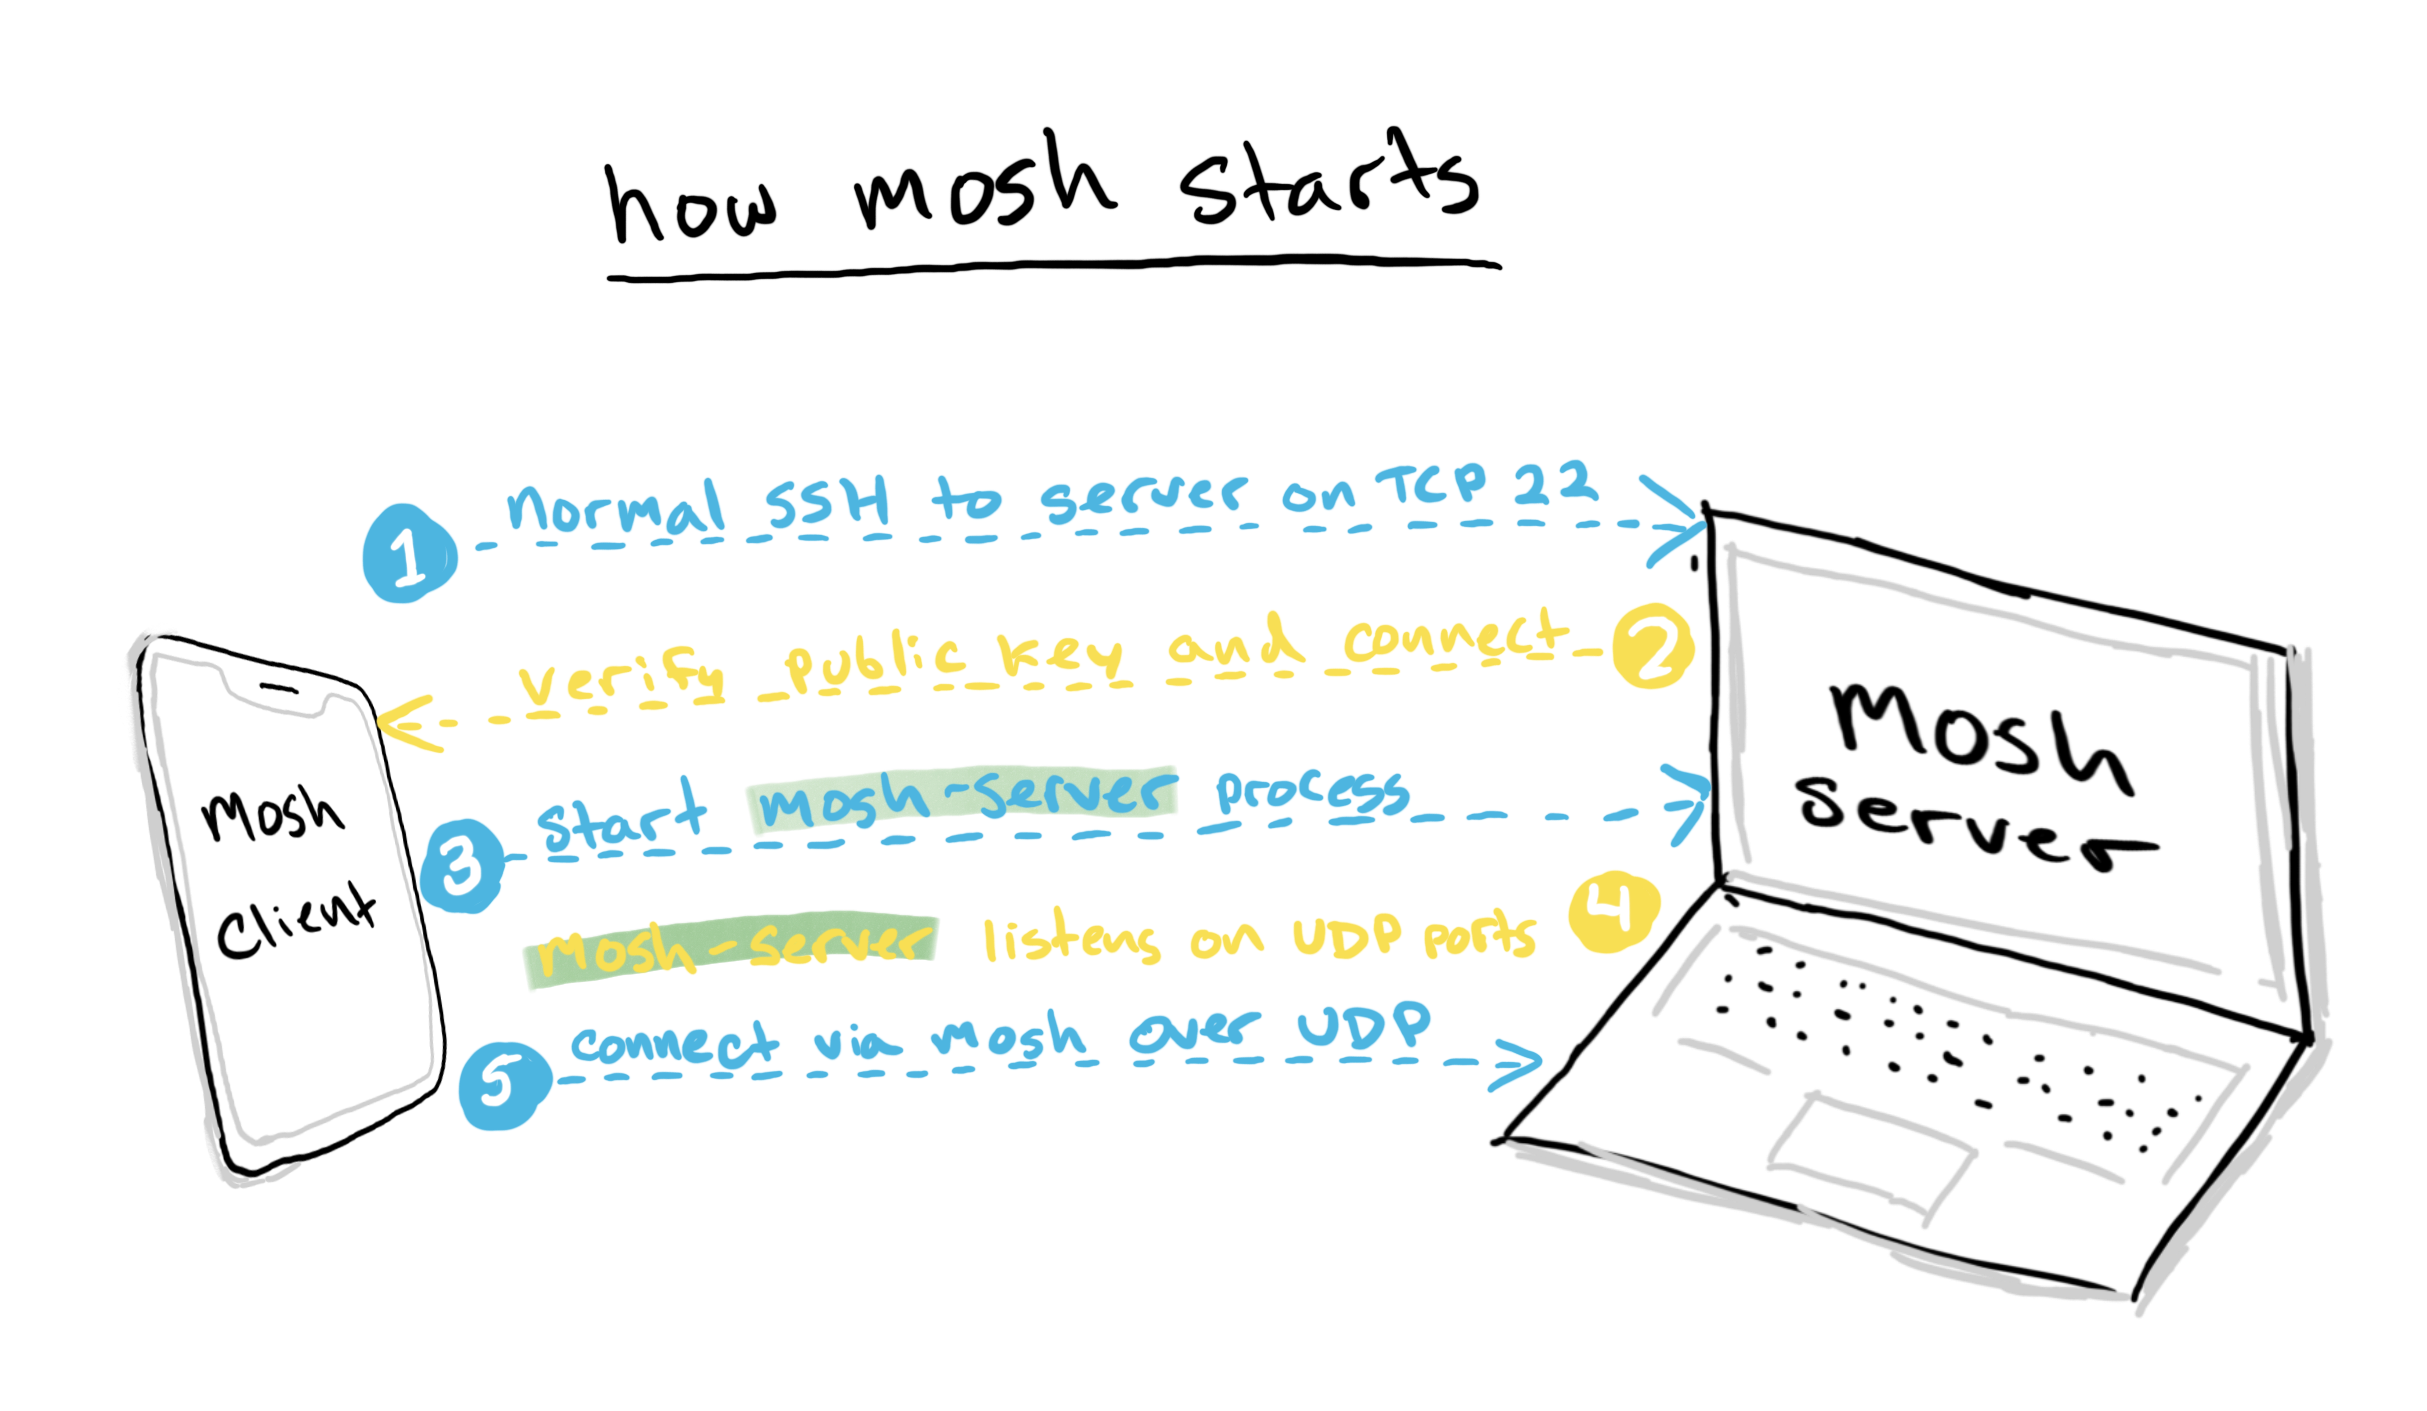
The mosh client first connects via SSH on port 22 using the standard protocol. Once connected, it starts the mosh-server for you, and then the client connects over UDP ports.
Testing it
Let’s make sure you can connect to the mosh server on your LAN at this point. With the client and server on the same network.
Type mosh your_user_name@your_server_ip using your username and local IP address, and press return. If all goes well, you should be asked for a password. Feel free to try it out. If you can’t connect, check System Preferences> Sharing> Remote Login is enabled (Mac)
Security upgrade
Logging in with a password is really not ideal as it can be guessed easily or brute forced. Let’s disable that and get set up to use a key pair instead.
On your Mac, edit your /etc/ssh/sshd_config and uncomment/set these options:
PermitRootLogin no
PasswordAuthentication no
PermitEmptyPasswords no
ChallengeResponseAuthentication no
On your iOS device, within the SSH app, generate a new key pair. This can be found in termius in the “keychain” panel. Once you have done this, export the public key, and get it over to your Mac. Append it on a new line to ~/.ssh/authorized_keys. Remember to generate and add a public key for each client device if you have more than one.
Test it again
Now when you connect, the public key will be used to identify the client and grant access, and a password should not be required
Access from an external network
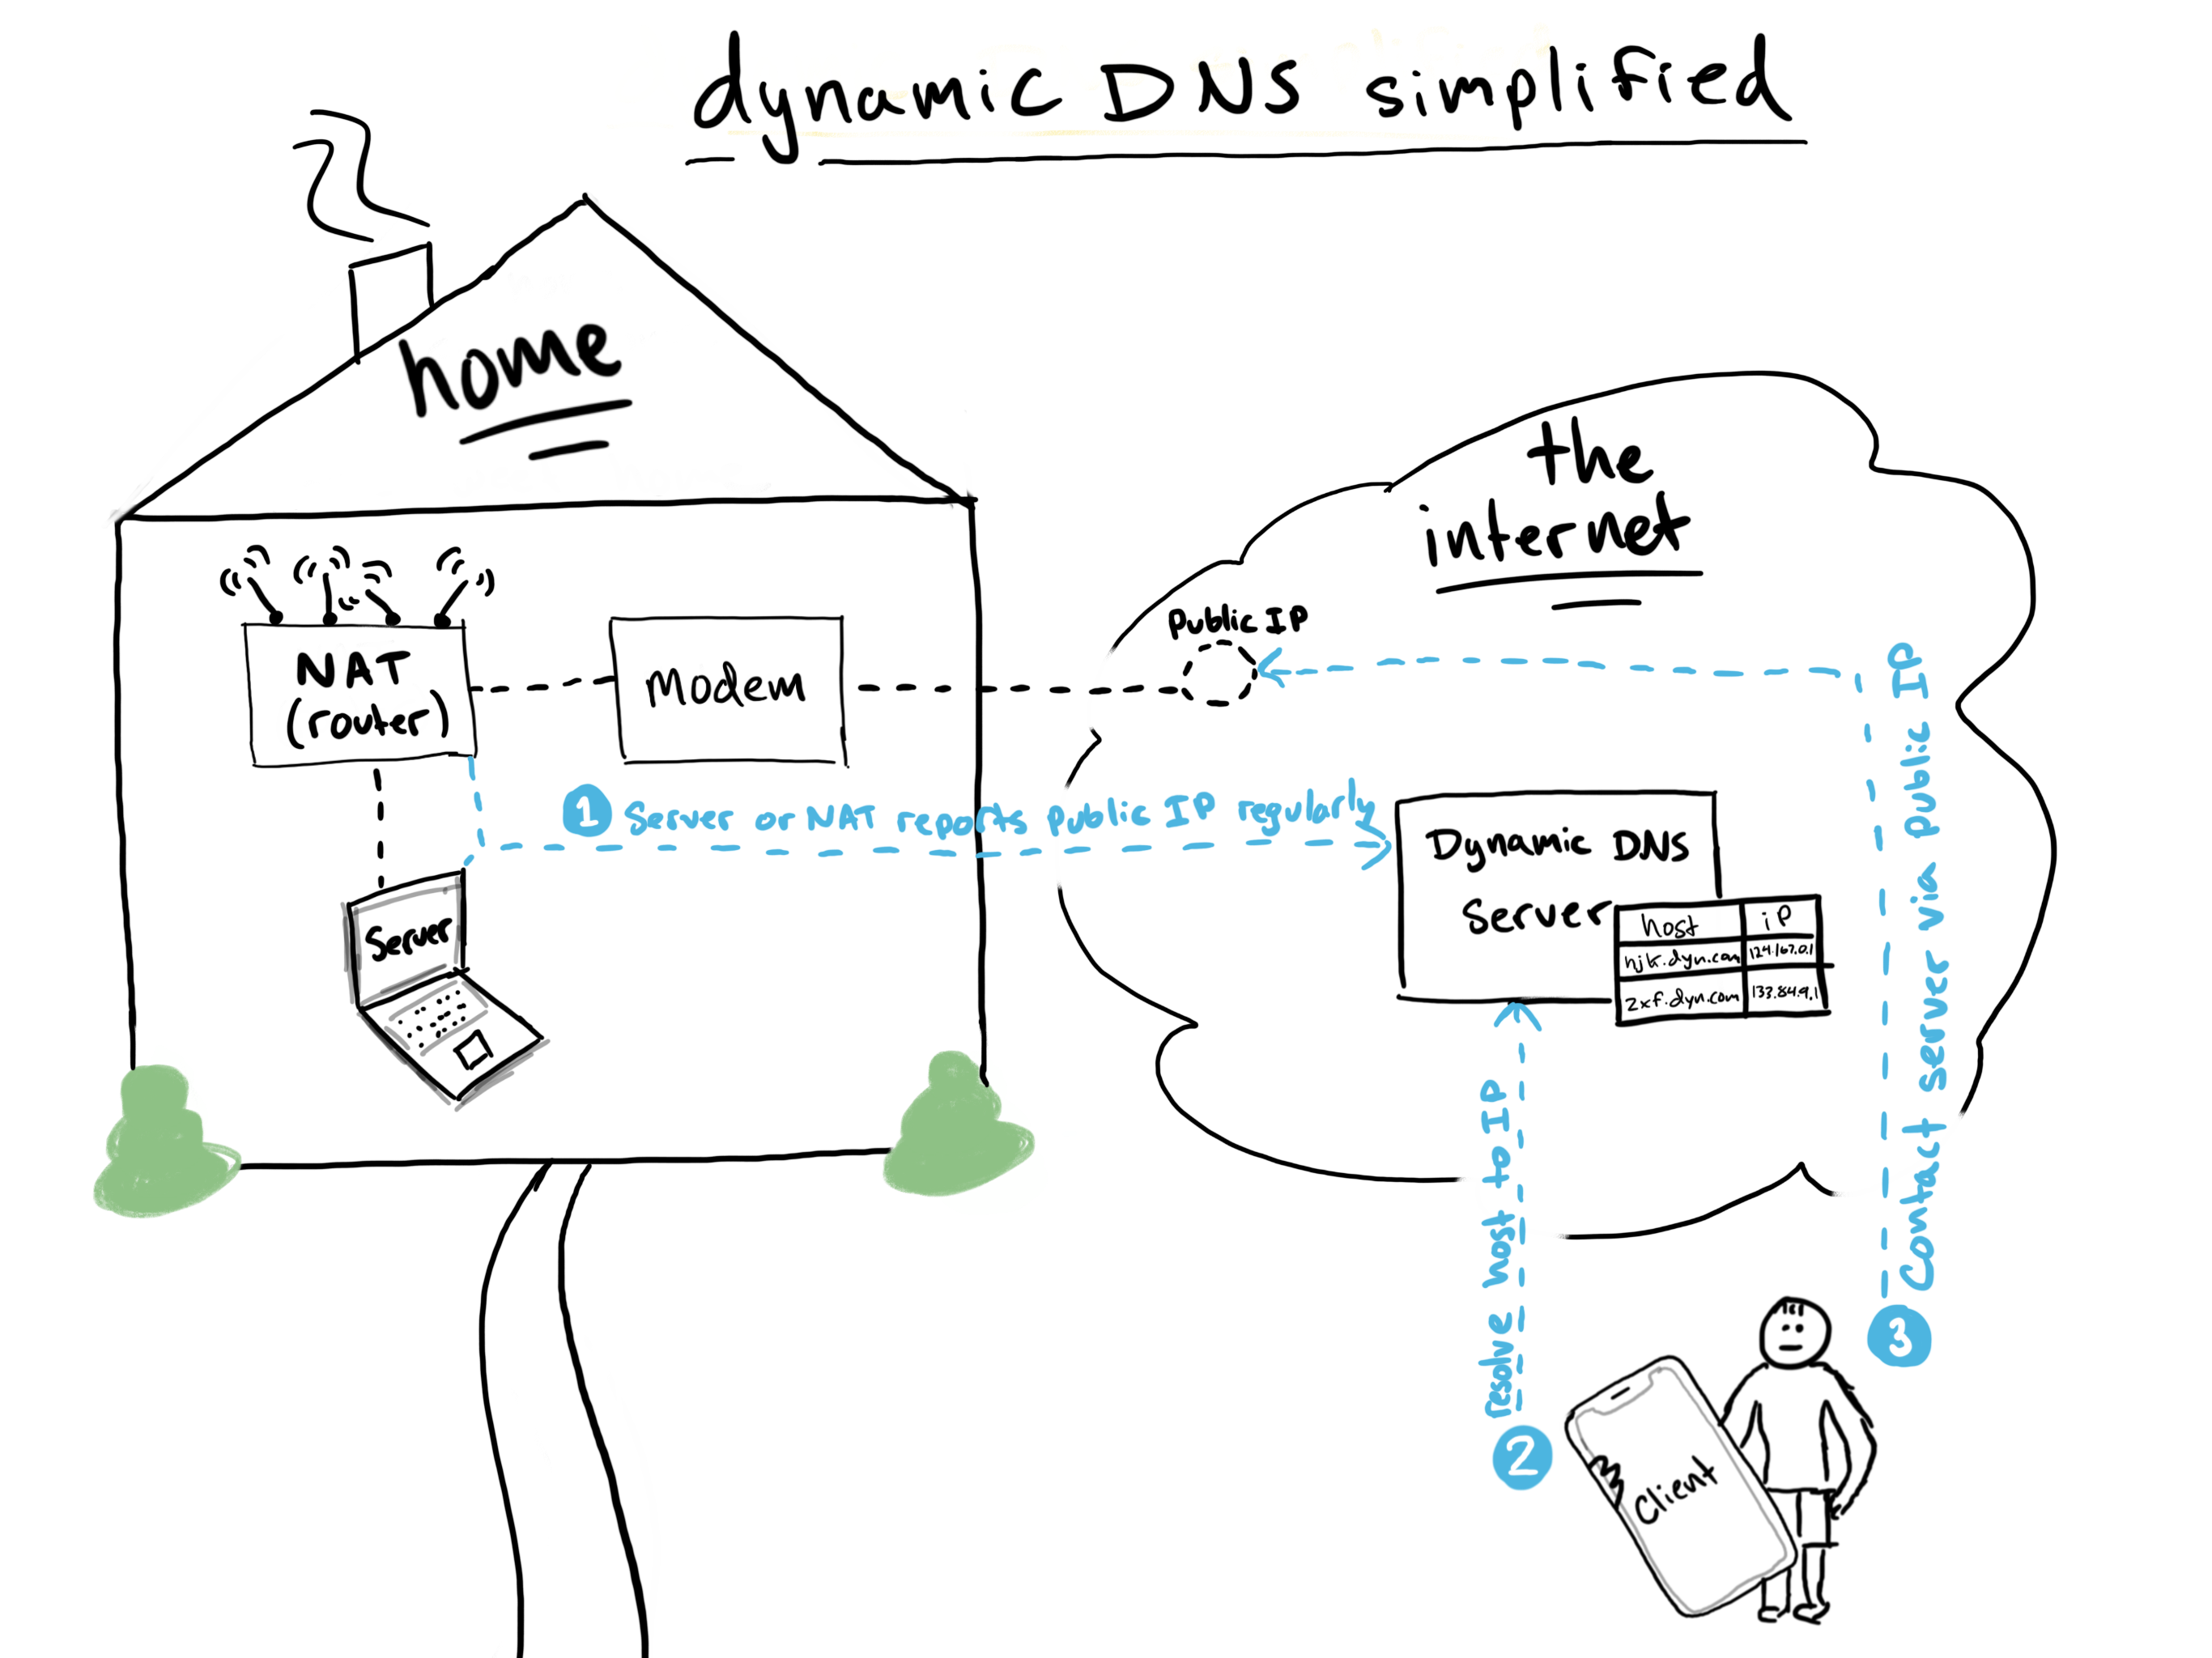
Up until now, we’ve been connecting over LAN, meaning both devices have had to be on the same network. The IP you’re using is issued by your router and internal to your network. We want this to work anywhere. The modem you have at home has a public IP address which you can see by visiting icanhazip.com, but on most home internet connections, that IP can change from time to time. To get around that, we can use something called Dynamic DNS. DDNS maps a public hostname to the IP address of your internet connection, and that IP address is kept updated by software running on your router or computer. If your server is running in the cloud, you can assign it a static IP or hostname for this purpose.
Head over to DuckDNS(duckdns.org), to set this up. DuckDNS will give step-by-step setup for a variety of systems. Additionally, you can configure your own prettier CNAME record pointing to whatever ugly hostname they assign you. Feel free to use a different provider, but this one is free and has worked well for me thus far.
Port Forwarding & Static IP
Now that Dynamic DNS is set up, and you have a hostname which should resolve to your server’s internet IP, you will probably need to forward some ports so that your router will pass the incoming SSH and Mosh traffic through to your server. Every router has a different interface for configuring this but you should be able to easily find instructions for yours.
Configure a your server to have static IP when it is on your network, and then forward these ports to it
| App | Protocol | Port(s) |
|---|---|---|
| SSH | TCP | 22 |
| Mosh | UDP | 60000-61000 |
If you want to constrain Mosh to a smaller range than the default, you can pass that range as a flag from the client when connecting.
Wake On LAN
Wake on LAN is a feature that allows your computer to be woken up remotely. This setting should be enabled in System Preferences > Energy Saver > Wake for WiFi network access.
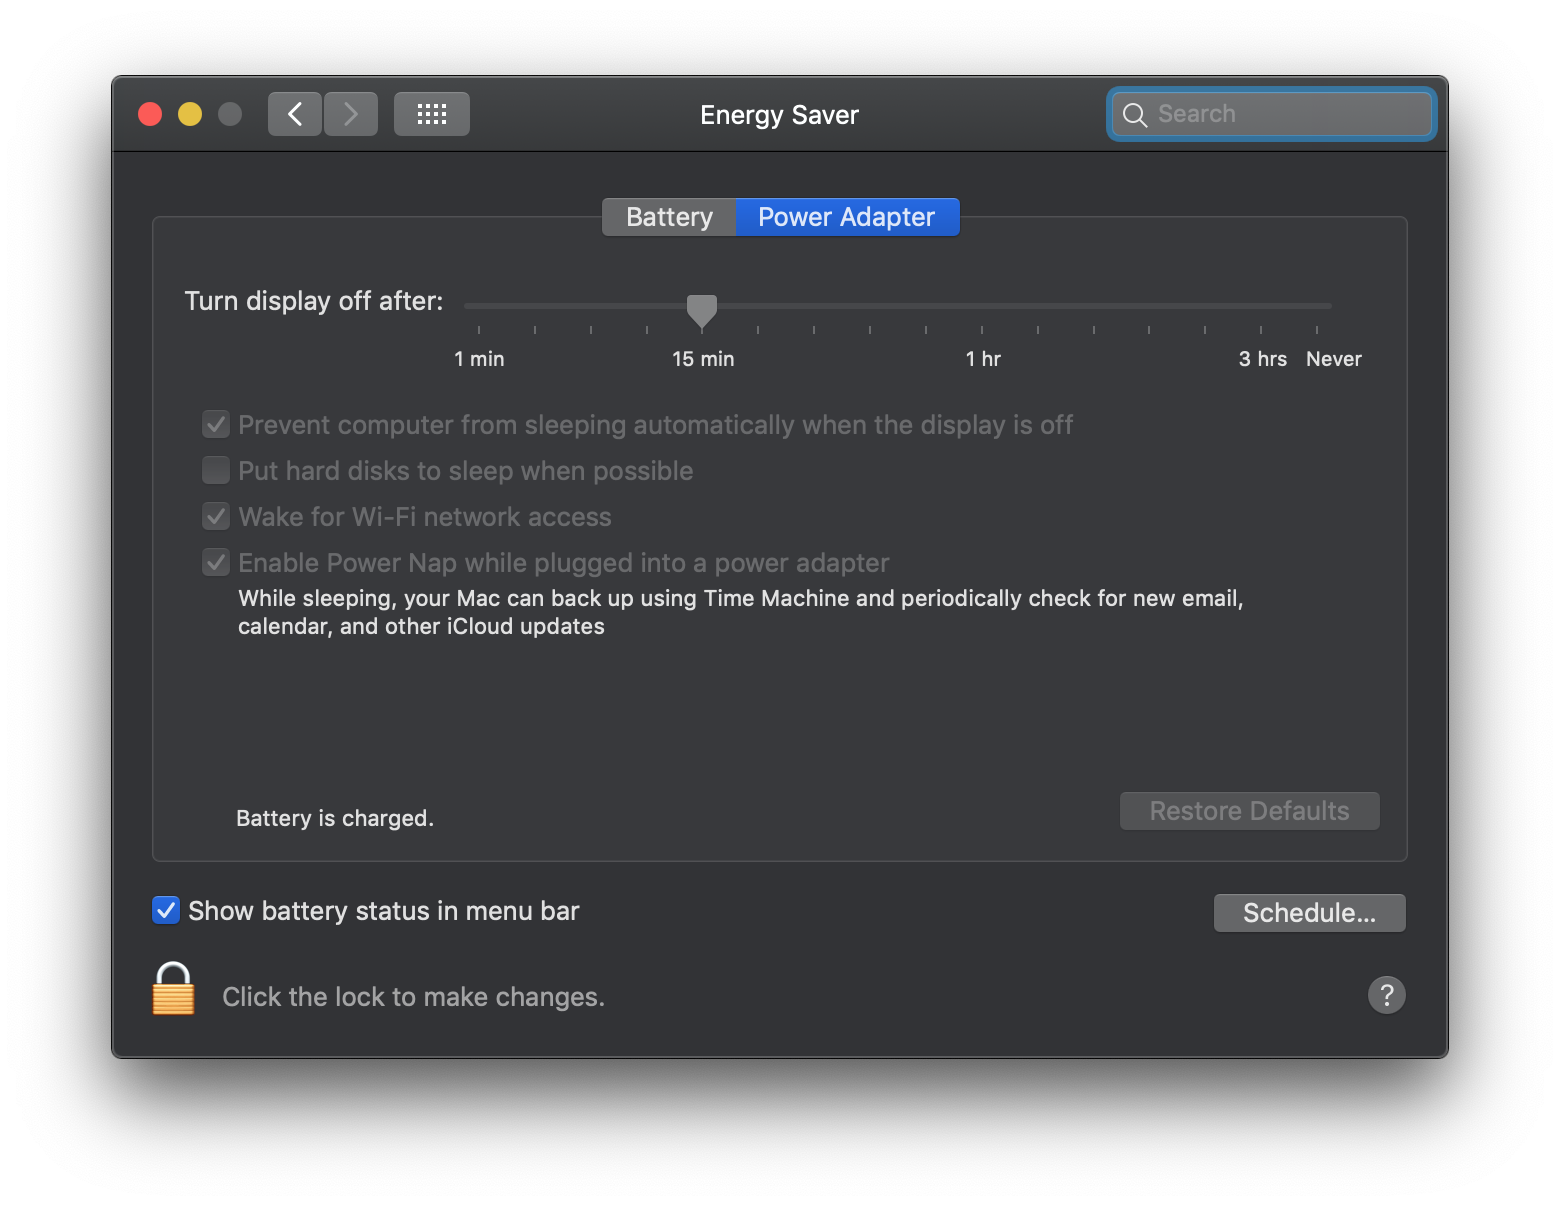
Note that in order to remote to your machine while it is sleeping, it should be plugged in and either open, or connected to an external display. My laptop is powered through the display’s USB-C, and if the display goes to sleep, the laptop stops receiving power. I disabled my monitor’s sleep feature because of this. Your setup will likely differ, but I recommend testing wake on LAN thoroughly before depending on your setup.
Test it out
Now is a good time to try connecting and instead of the LAN IP you provided before, use your Dynamic DNS hostname. Even if you are on the same LAN, Dynamic DNS should resolve your public internet IP, and you’ll route you through that. If you have a client with a cellular connection such as an iPhone, you may also try disabling wifi and connecting. Congrats! The complicated network plumbing is done.
tmux
Tmux is short for terminal multiplexer. Basically, it manages terminal sessions on the server side. It supports several levels of workflow management within a single terminal window. The most powerful of which, is the “session“.
Sessions: Think of them as workspaces. You might have a session for each unrelated project, where each project has some editors and command lines open. Sessions will save the state of your workspace, and you can “attach” or “detach” to a session from any device. In other words, you can be working in a session at home on your laptop, and then pick it up later from your phone or tablet.
Windows: A session can have many windows. A window is just a terminal window, but in this case, tmux is managing windows on the server side as opposed to you opening multiple windows on the client app.
Panes: Panes are splits within windows, so you can have an editor and a command line side by side for tweaking code, and running commands quickly.
tmux has a steep learning curve due to the many key bindings, but it is not hard to get the basics down. It is essential to working effectively from a terminal.
Vi/Vim/Nvim/Emacs
My editor of choice is Nvim, but there are many other options. You will need to be comfortable editing text files in a terminal-based editor. Like tmux, there are a lot of keybindings to learn since these programs are entirely keyboard focused with little-to-no support for a mouse, much less a touch screen. If you are an IDE person, many of the creature comforts you are accustomed to, like highlighting, autocomplete, and language-specific shortcuts, are available as plugins.
Extras
Tunneling
A common workflow in web development is to run a server on a port other than 80 and test it via the web browser or curl command. Indeed this is possible using a marvelous tool called ngrok
brew install ngrok
Say I have a dev server running on port 8080. I would run ngrok http 8080 and this would open a tunnel to to that port, exposed through a public URL. I can open this in a browser from anywhere, including my client device, and see my changes live there.
External Displays
Tablets and phones these days have staggering resolution and support HDMI out (albeit with an adapter). You’ll be surprised at how much code can fit on a modern iPhone display, but even more surprising is the actual resolution being pumped out which far exceeds 1080p. You can scale the display down and it will remain crisp, but you’ll strain your eyes trying to read. Pack yourself the adapter and an HDMI cable and plug into any television for more comfortable editing. Just bear in mind that a phone or tablet UI still assumes you to be able to touch the screen for anything outside the terminal app, which means the ergonomics might be poor if you have too short a cable, or nowhere good to sit.
Cloud Based Server
Taking this concept a step further and using a dev machine based in the cloud should be trivial, since you may skip the compelxity of setting up Dyn DNS and just assign your instance a static IP. It is even possible to save money by powering it down, or resizing it depending on the workload.
Dash
Certainly not a requirement, but Dash is an excellent app for pre-downloading programming and API documentation. It has a good UI with fuzzy search. When working on a laptop or iPad, I constantly tab over to it as reference.
Thats all
So there you have it. You should now be able to edit code and run commands remotely. Look out for future posts on this topic as I and find new use cases and develop my workflows further.